

Part 2
Winging it.
Now comes the juicy part.
From menu hit Expert and go to Airfoils
In here you need to change Wing airfoil shape from Carenado made to one of the stock that are included in Xplane 11 from the get go.

By clicking on the gray square you can load various airfoils from "airfoils" directory of your X-Plane install.
Change these to ones on the screen.
This setting affects shape of the wing.
Left is shape for root portion and right is for tip of the wing.
Values below are for mixing between upper and lower for the tip and root so that editor would interpolate between the two.
We have two same settings therefore no interpolation.
Now close this menu and go to:
Standard - Misc Wings

You may freak out now

Just kidding it is simple if you want to just replicate what i made.
And not that hard if you want to understand it. You can hover over the values and read up on the tool-tips explaining what these values change.
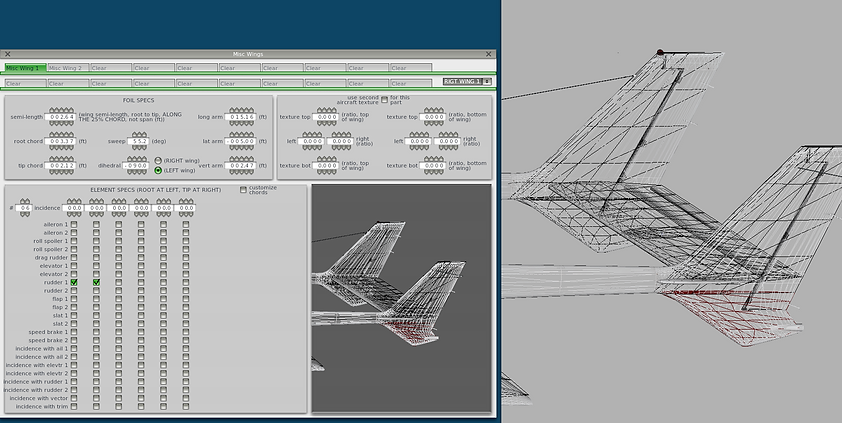
You might want to manipulate the camera to move your view to the tail of the plane. In order to see where we will work.
Your menu for misc wings is currently empty.
As you add more value this will change.
Start with FOIL SPECS part
These values will decide dimensions and position relative to datum point
our miscellaneous wing will be located.
trivia:
Datum point is arbitrary location on airplane selected by creator which is used to communicate and calculate location of each part or position of values like lever arm, COG etc.
It is usually placed near the wing leading edge or near instrument panel bulkhead.
Simply add exactly same values and keep keen eye on +- sign
Reason why am i now showing you exact values on the screenshot
is because this part is my own creation. This part is not in original module.
And you will make it yourself.
If you look to the right you might just spot that you are creating that little lower vertical stabilizer part ;-)

When you are done with size and position, add 6 to number of wing pieces.
(Next to incidence settings)
This will brake our basic shape into 6 separate pieces and allow us customize the shape in detail
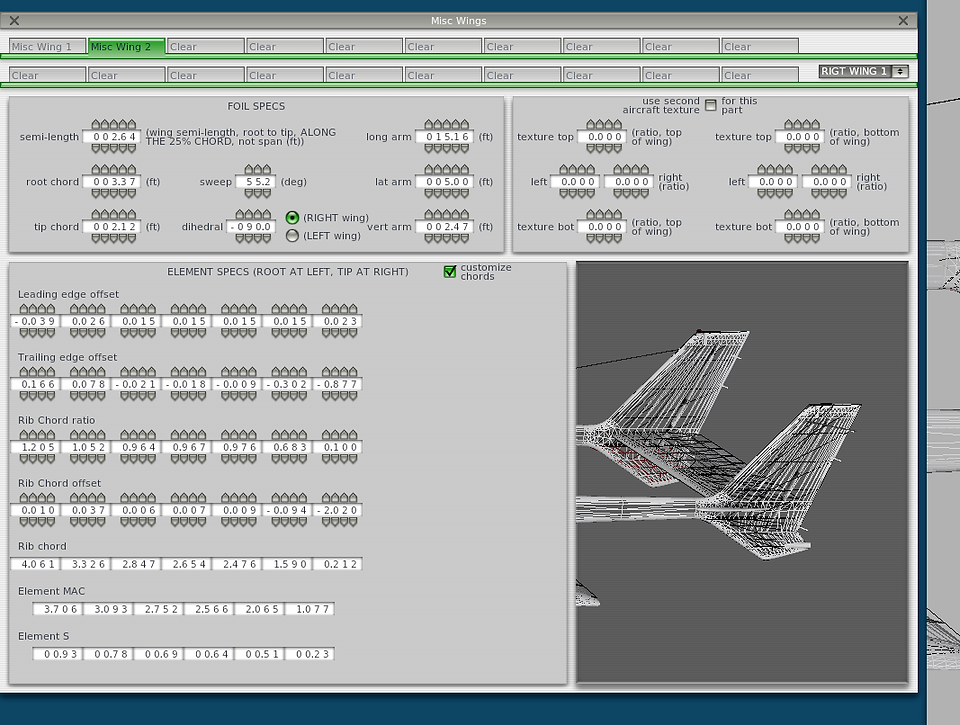
Next
click the "customize chord"
This will unlock precise shape values.
Just duplicate, what you see on the next picture bellow.
If i am not mistaken last two rows will be set just by setting first two.
But go through each value when you are done, just in case.
They might change slightly as you manipulate others.

Done ? Great!
Look up and start new wing part. It will automatically name itself
Misc Wing 2 as you add values from pictures that will follow bellow.

Now that you are familiar with the process.
We will continue to original parts and modify them.
Process will go as follows:
I will show you picture with values that are different from the original.
Rest i have to blur out. So before you start make a screenshot of those original values. Just in case you need to look them up.
What you do is just change what has changed and leave rest as it is.
If you are still in misc wings menu close it.
And go to Standard - Wings
Now you are in Wing 1 setting.
This is setting for the whole left and right wing.
It is just mirrored.
Unlike the Vertical Fins we have to do this just once.

Now customize the chords.
There is nothing to blur here its all different.
You can see here that original values are very basic and nobody put much effort into them.
Unlike the visual model which is gorgeous.

Wings done ?
Move over to Horizontal stabilizer.
And do the same.

Good news.
No need to edit chords details on Horizontal stabilizer. ;-)
Head on over to Vertical Stabilizer 1

Again no edit to chords details.
Go to Vertical Stabilizer 2

You can congratulate yourself.
Hard part is over.
All that is left are some tweaks. Nevertheless very important ones.
Was this site helpful ?
Please consider buying me a

